Getting Started with Amazon Athena, JSON Edition
At AWS re:Invent 2016, Amazon announced Amazon Athena, a query service allowing you to execute SQL queries on your data stored in Amazon S3. Athena can query against CSV files, JSON data, or row data parsed by regular expressions. Using Amazon Athena, you don’t need to extract and load your data into a database to perform queries against your data.
Amazon Athena is not a full CRUD database system. It can only query data. So you basically can only perform SELECT queries on your data in S3. You cannot execute any INSERT, UPDATE, or DELETE queries.
We wanted to do some experimenting with Athena to see what it can do.
Our Use Case
Many of the Athena examples already out there are using various forms of log data. That being row data parsed by regular expressions. We wanted to try querying data in JSON format.
Our Input Data
Our input data is JSON data like the following:
{
  "name": "Albert",
  "numPets": 1,
  "birthDate": "1970-01-01 07:20:00"
}
However, Amazon Athena requires the data to be “one record per line” in the object files. So the JSON data must be all on one line. So our JSON data looks like this instead.
{ "name": "Albert", "numPets": 1, "birthDate": "1970-01-01 07:20:00" }
We placed the JSON files in our S3 bucket in a flat list of objects without any hierarchy:

Note: Athena is capable of querying nested JSON data, but we are not doing that in this example.
Creating Our Database and Table
The first thing we need to do to start querying data using Amazon Athena is to create our database and table. Databases in Athena aren’t real databases: they don’t store anything aside from table schemas. Creating the database is done in conjunction with creating the first table. So, in our Athena Management Console, we went to the “Catalog Manager” and clicked the “Add Table” button.
For step 1, we called our database “TestDb” and the table “Table1”. Previously, we created an S3 bucket called “athena-testing-1”, so under “Location of Input Data Set”, we specified s3://athena-testing-1/Test1/. The location is a combination of bucket name and prefix. Notice the trailing slash at the end of the location. You can think of it as a folder or directory that the input data will be stored in.

For step 2, we selected “JSON” for the data format since our data is in JSON format.
For step 3, we added 3 columns:
- Column 1:
- Name: name
- Type: string
- Column 2:
- Name: numPets
- Type: int
- Column 3:
- Name: birthDate
- Type: timestamp
Notice that the name of the columns matches the names of the properties in the JSON data. The JSON data can include more data than we create columns for. That extra data will simply be ignored by Athena.
For step 4, we did not setup any partitions.
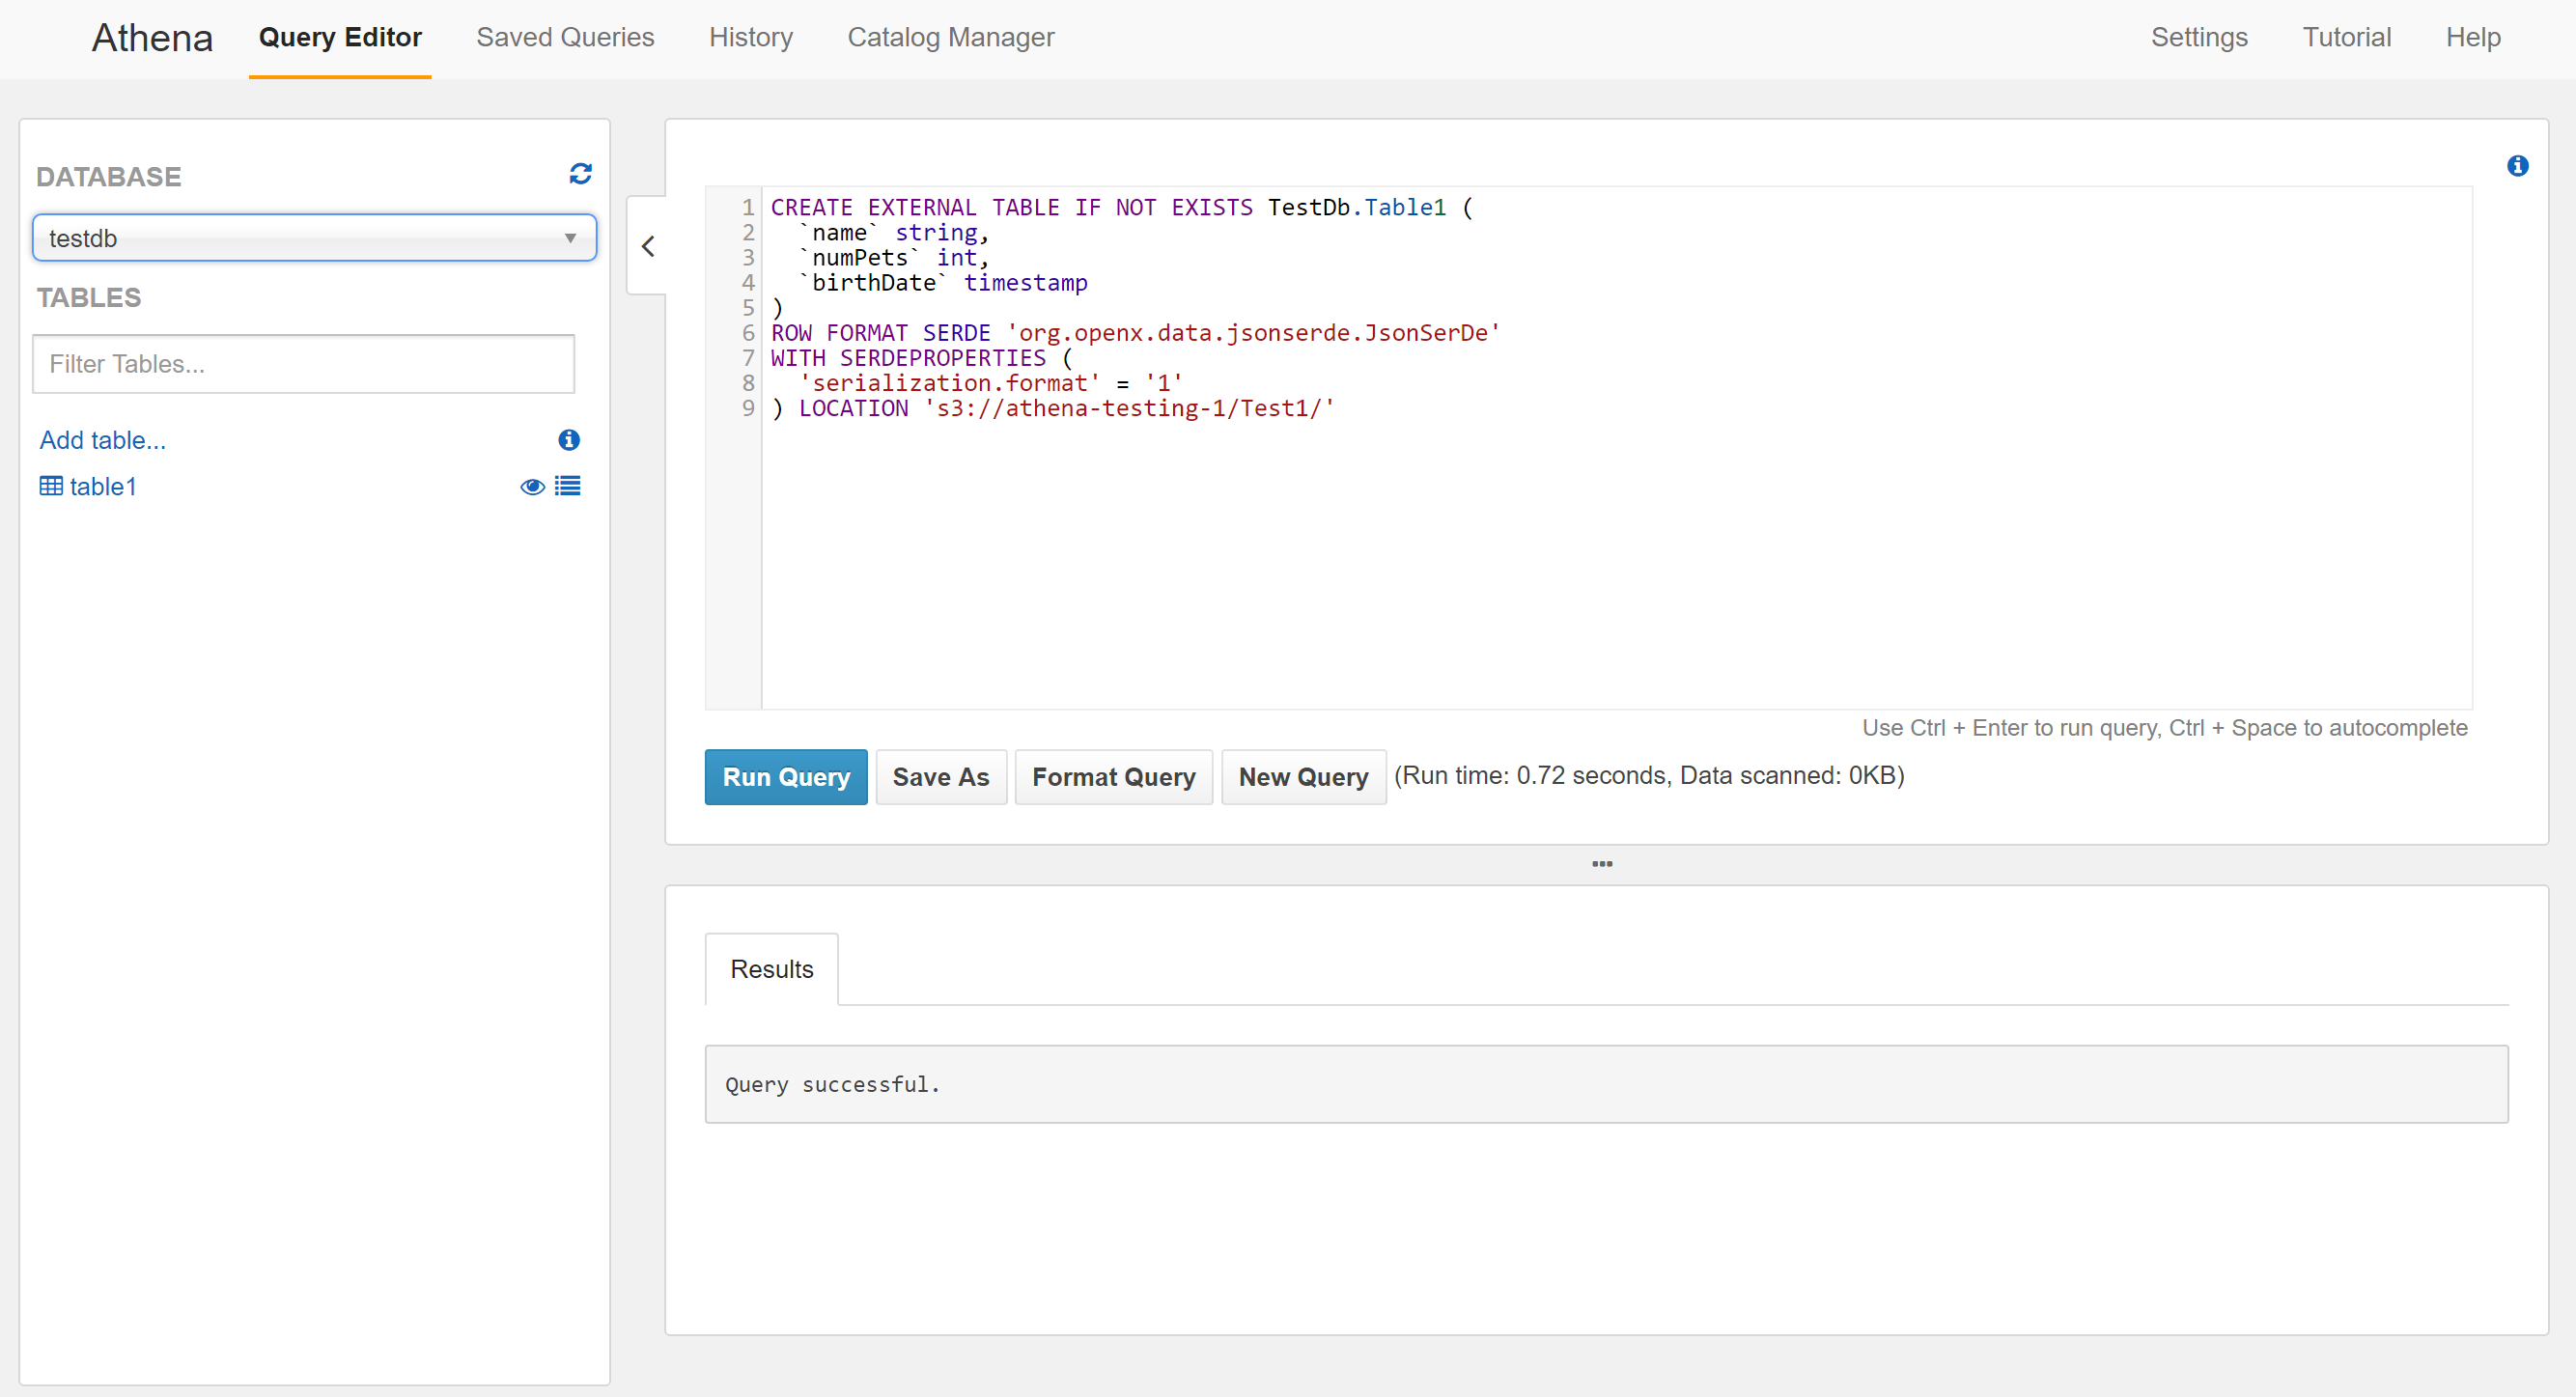
After clicking “Create table”, we are sent back to the Query Editor. You’ll notice that the query editor has been populated with a CREATE EXTERNAL TABLE query. This query has already been executed. The new database has been created and appears in the “Database” dropdown field. Once we select the new database, our table appears in the list of tables.
Querying the Data
Now that our table is created, we can start executing queries on the data. This is done by issuing standard SQL SELECT statements.
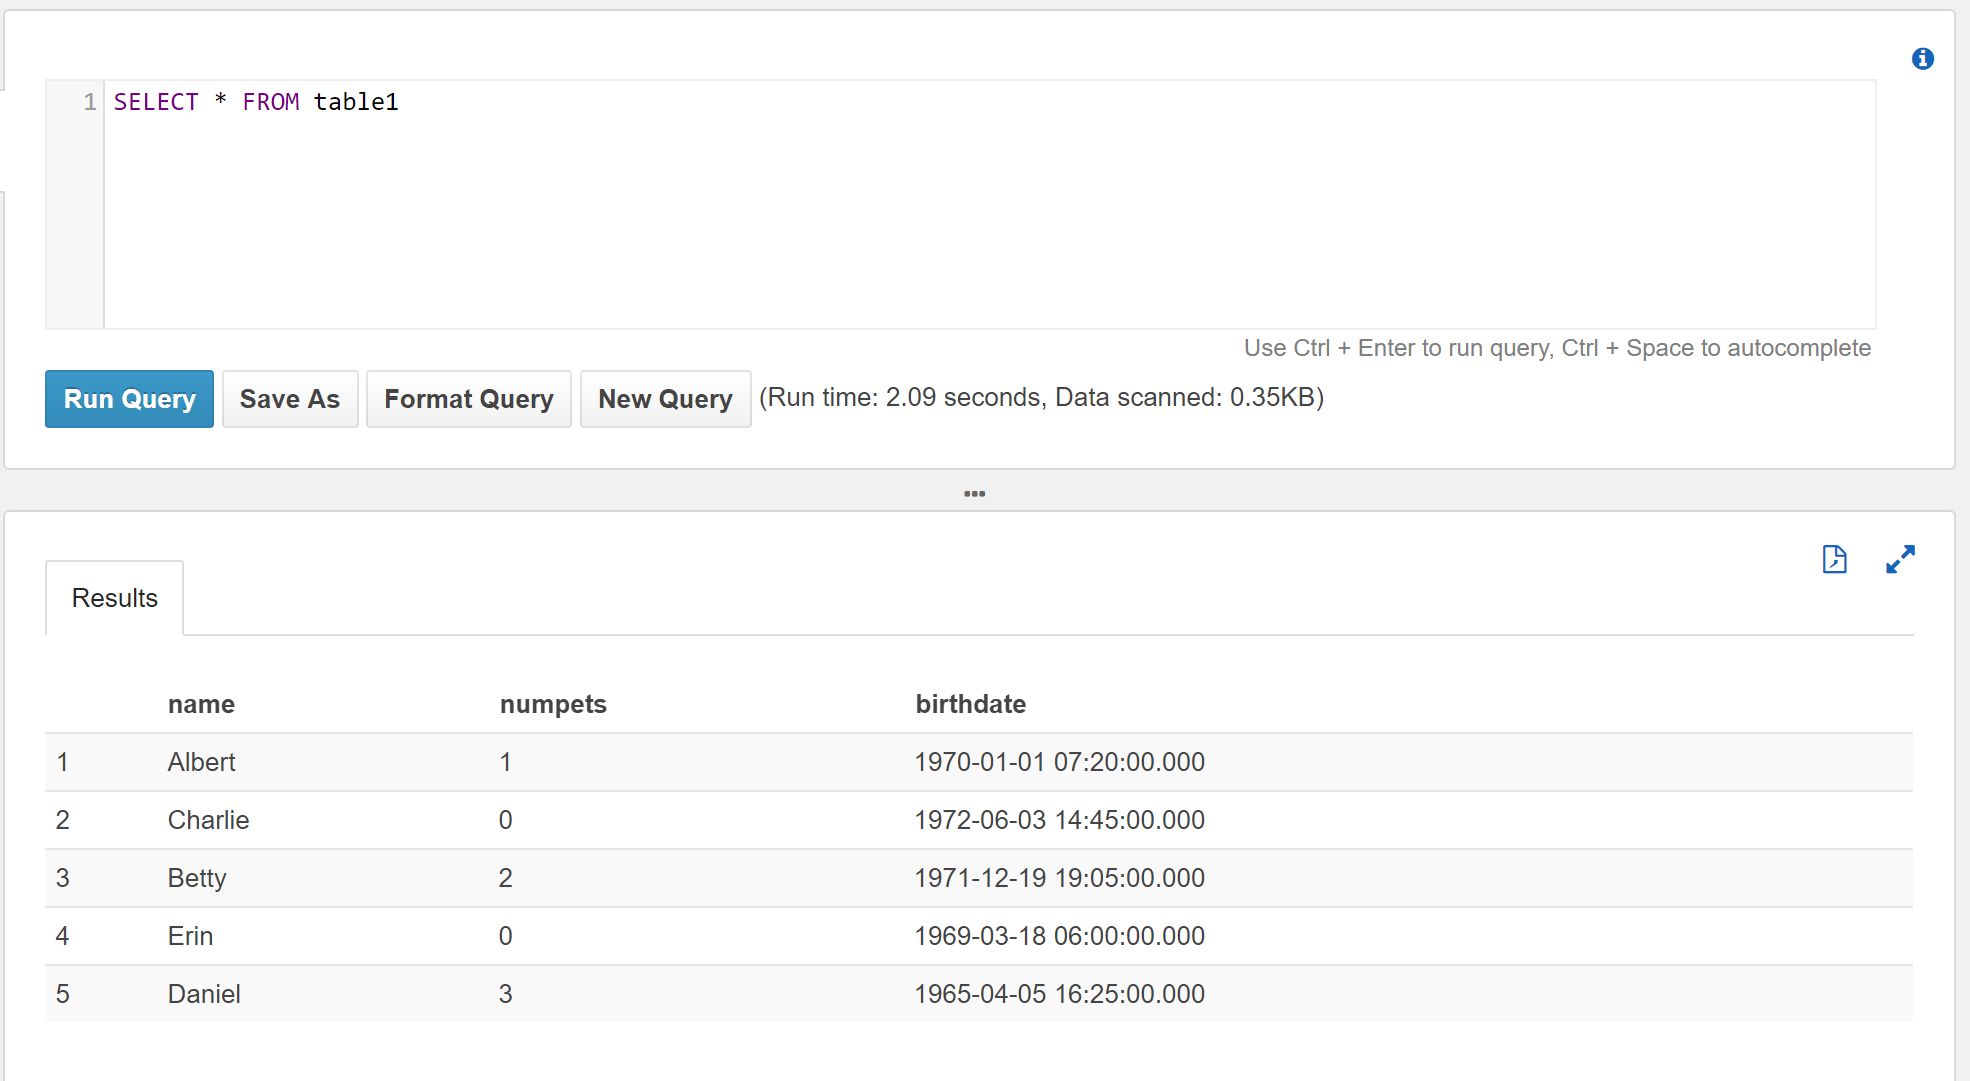
We can issue a basic SELECT such as:
SELECT * FROM table1
We can also order the results using ORDER BY clauses:
SELECT * FROM table1
ORDER BY birthDate DESC

And we can restrict the results using WHERE clauses:
SELECT * FROM table1
WHERE numPets > 1

Notice the “Run time” and “Data scanned” statistics are reported for the query. Amazon Athena is priced based on the amount of data scanned. So you will want to pay attention to the “Data scanned” value.
Query History
All Amazon Athena queries are recorded and the results are placed in a new S3 bucket. In many cases that bucket is called aws-athena-query-results-<account id>-<region>.
You can access the query history in the Athena Management Console from the “History” tab. It will list:
- the query,
- it’s execution time,
- the run time, and
- the amount of data scanned.
You can click the query to load it into the query editor (where you can edit it and/or re-execute it).
Additional Thoughts
Amazon Athena is priced based on the amount of data scanned. There are a few techniques that you can use to reduce the amount of data scanned:
- Compress the data,
- Use partitions
We will take a look at both of these later on.
Articles In This Series
- Getting Started with Amazon Athena, JSON Edition
- Using Compressed JSON Data With Amazon Athena
- Partitioning Your Data With Amazon Athena
- Automatic Partitioning With Amazon Athena
- Looking at Amazon Athena Pricing
About Skeddly
Skeddly is the leading scheduling service for your AWS account. Using Skeddly, you can:
- Reduce your AWS costs,
- Schedule snapshots and images, and
- Automate many DevOps and IT tasks.
Sign-up for our 30 day free trial or sign-in to your Skeddly account to get started.